Skip to content
Product Tour
Pricing
Support
Blog
Menu
Product Tour
Pricing
Support
Blog
Try it Free
Login
Follow the step by step instructions below to install and activate the base version of WP Spell Check
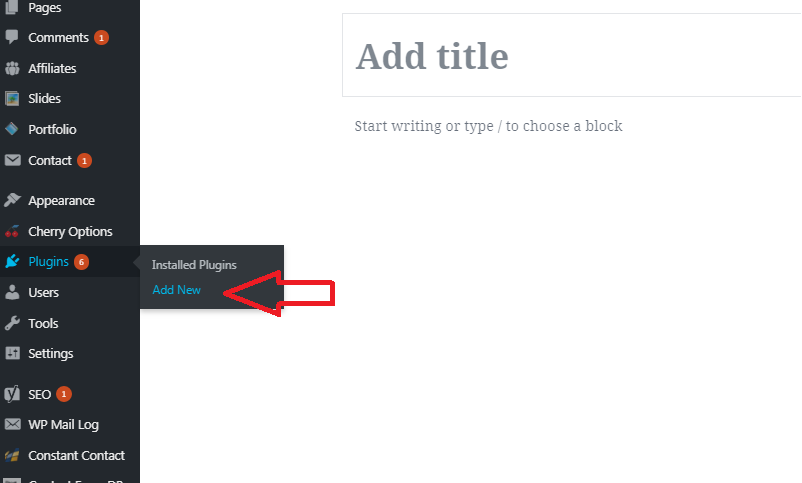
1- Login to your website and go to the ‘add new’ page under the plugins section of the WordPress administration panel
2. In the search box, search for WP Spell Check
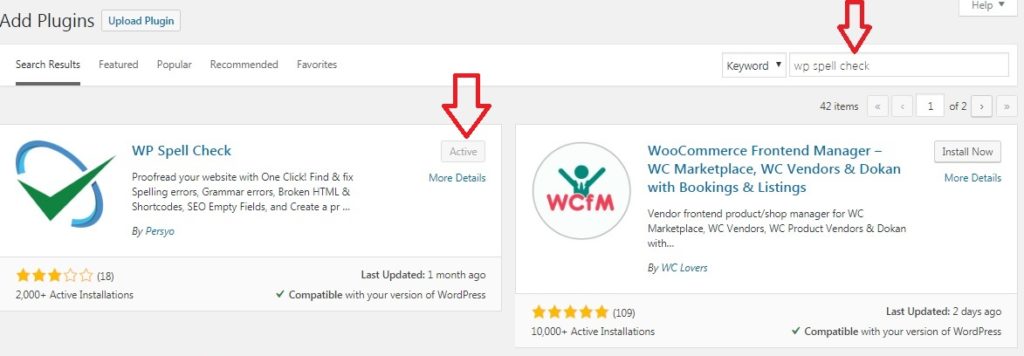
3. Click on “Activate” to activate the plugin
4. Visit the Options page to set your options and start proofreading your website.
Tagged
WordPress Spell Check Installation
,
WordPress Spell Checker plugin
,
WP Audit
,
WP Spell Check Base Version setup
We use cookies to ensure that we give you the best experience on our website. By continuing to use this website you agree to the storing of cookies on your device.
Ok
Privacy policy